That expensive conditioned air is often escaping through holes you cannot see: gaps around wiring, open framing cavities, recessed lights, and plumbing penetrations hidden beneath attic insulation. This guide to attic air sealing explains how to find those leaks, seal them correctly, and protect the performance of the insulation above them.
Why attic air sealing comes before more insulation
Insulation slows heat transfer, but it does not reliably stop moving air. When warm indoor air finds a path into the attic during cold weather, it carries heat and moisture with it. In summer, hot attic air can be pulled into the home through the same openings. The result is familiar: rooms that never seem comfortable, HVAC equipment that runs longer, dustier indoor air, and energy bills that stay higher than they should.
Air leaks also create a stack effect. Air escaping near the top of the home pulls replacement air in through lower levels, including crawl spaces, garages, exterior wall gaps, and other unconditioned areas. That is why a drafty attic can affect comfort far beyond the second floor.
For homes in Payson and the Rim Country, where cool winters, warm summers, and sharp temperature swings can all occur, controlling attic leakage is a high-value improvement. It helps the whole building envelope work as a system instead of asking the heating and cooling equipment to compensate for hidden gaps.
Start by identifying the attic floor boundary
In most conventional homes, the thermal and air boundary is the attic floor, not the roof deck. Your goal is to separate the conditioned living space below from the unconditioned attic above. Every opening through that boundary deserves attention.
Before moving insulation, take photos and look for dark staining, displaced insulation, frost marks in cold conditions, or areas where insulation appears unusually thin. These can point to air movement. A professional assessment may use diagnostic tools such as a blower door and infrared imaging, but many common leaks are visible once insulation is carefully pulled aside.
Common attic air leaks to inspect
The biggest leaks are rarely dramatic. They are usually routine construction details left open around components that pass through the ceiling. Check around plumbing vent stacks, electrical wires, junction boxes, ceiling light fixtures, bath fan housings, duct chases, and chimney or flue penetrations.
Also inspect the attic hatch or pull-down stair. This large opening is often uninsulated, poorly weatherstripped, or both. If it does not close tightly, it can leak as much air as several smaller penetrations combined.
Look closely at interior wall top plates. Framing cavities above partition walls can be open to the attic, allowing conditioned air to travel into walls and out through the attic. Soffits over kitchen cabinets and dropped ceilings are other frequent bypasses. They may look sealed from the room below while remaining completely open from the attic side.
How to seal attic gaps safely and effectively
Attic air sealing is detail work. The right material depends on the size of the gap, the surfaces involved, and whether heat-producing equipment is nearby.
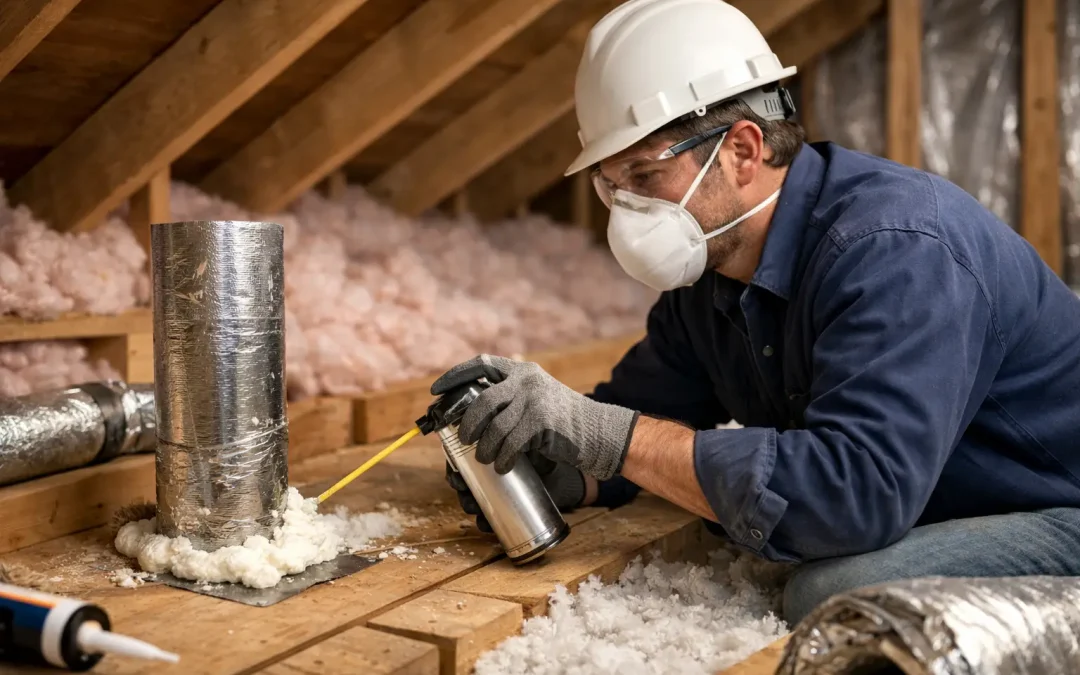
Small openings around wires, pipes, and framing can often be sealed with an appropriate low-expansion spray foam. Larger holes, such as open soffits or chases, usually need a rigid backing material first. Contractors commonly fit rigid foam board or another approved blocking material into the opening, seal its edges, then insulate over it. This creates a durable air barrier instead of trying to fill a large void with foam alone.
Use caulk for narrow, stable gaps where it is compatible with the surfaces. Use weatherstripping around attic hatches and add a rigid, insulated cover above the hatch when possible. The cover should be easy to remove for access but tight enough to control air leakage.
Keep the following areas in mind before applying any sealant:
- Chimneys, flues, and certain vent pipes require noncombustible clearances. Do not spray foam directly against a heat source or ignore manufacturer-required spacing.
- Recessed lights must be rated for insulation contact before insulation is placed against or over them. Older non-IC fixtures may need a properly sized fire-safe enclosure.
- Electrical boxes and wiring should remain accessible where code requires it. Do not bury unsafe connections or cover damaged wiring.
- Bathroom fans must vent outdoors through properly connected ductwork, never into the attic.
If you are unsure whether a penetration is hot, code-sensitive, or tied to combustion equipment, stop and have it evaluated. Air sealing should improve building performance, not create a fire or ventilation hazard.
Do not block attic ventilation
Air sealing the ceiling plane is different from sealing the attic itself shut. A vented attic still needs its intended ventilation path, typically from soffit intake vents to ridge or roof exhaust vents. Keep insulation from clogging soffit vents by using baffles where needed, and never foam over active ridge, gable, or soffit vents in a vented attic design.
The exception is an unvented attic assembly, where insulation is applied at the roofline to bring the attic inside the conditioned envelope. Closed-cell or open-cell spray foam may be used in these designs depending on the roof assembly, moisture conditions, required R-value, and local code. This is not a casual material swap. It needs a clear plan for moisture control, ventilation, and mechanical equipment located in the attic.
Insulate only after the air barrier is complete
Once the attic floor is sealed, insulation can do its job far more effectively. Fiberglass blow-in, fiberglass batts, rockwool, and spray foam all have appropriate applications, but their results depend heavily on installation quality.
Loose-fill insulation is an effective option for many open attic floors after air sealing is complete. It must be installed evenly to the required depth without leaving thin spots at the perimeter or around obstructions. Batts can work well in accessible, regularly framed areas, but gaps, compression, and poor cuts reduce their performance.
Spray foam is the premium option when the project calls for insulation and air sealing in one application. It is particularly valuable at difficult transitions, rooflines, crawl spaces, irregular framing, and assemblies where stronger air control and moisture resistance are priorities. Closed-cell foam provides a higher R-value per inch and can add rigidity, while open-cell foam is often selected for larger cavities and sound control. The right choice depends on the assembly, budget, and performance goal.
When a DIY project makes sense and when to call a professional
A careful homeowner can often weatherstrip an attic hatch, seal minor pipe and wire penetrations, and add baffles before new insulation is installed. Wear protective clothing, gloves, eye protection, and a properly fitted respirator when working around dusty insulation. Walk only on framing or installed walk boards, never on ceiling drywall.
Professional help is the better investment when the attic contains extensive bypasses, existing moisture damage, complex ductwork, combustion venting, knob-and-tube wiring, or a plan to convert the attic into a conditioned space. A contractor can identify leakage paths that are easy to miss and recommend an insulation system that fits the home’s construction rather than applying a one-size-fits-all solution.
This is especially true when ducts or air handlers are located in the attic. Leaky ducts in extreme attic temperatures can undermine the benefit of new insulation. Addressing duct connections, duct insulation, and attic air leakage together produces better comfort than treating each issue separately.
Mistakes that reduce the value of attic air sealing
The most common mistake is adding more insulation over leaks without sealing them. The home may gain some R-value, but air continues to bypass the insulation layer. Another common error is using expanding foam everywhere, including locations where fire-rated materials, clearances, or service access are required.
Homeowners also sometimes seal ventilation openings while trying to stop drafts. That can trap moisture in a vented attic and create roof-deck problems. Conversely, relying on attic ventilation to solve ceiling air leaks does not work. Ventilation manages the attic environment; air sealing controls the connection between the attic and your living space.
Finally, do not overlook moisture clues. Wet insulation, roof staining, mold growth, or persistent odors may indicate a roof leak, disconnected bath fan, duct condensation, or indoor humidity issue. Those causes should be corrected before new insulation covers the evidence.
A well-sealed attic is not flashy, but you notice it where it counts: steadier room temperatures, fewer drafts, cleaner indoor air, and less strain on your heating and cooling system. If your attic has never been evaluated as part of the whole home, that is often the best place to begin improving comfort that lasts.